So it's been a couple of years since I've updated this nonsense. So here's the skinny since the last post 2-1/2 years ago.....don't judge!
I really struggled with the H-Apron. My buddy Steve Burns let me borrow some dolly's and I was able to man handle and beat it into submission......good therapy by the way. I finally got the right shape and just had to use some filler to get the finished look. I worked on that damn thing for hours here and there but I finally got it looking half ugly. I pressed on to the other needy items.
Body not sitting on the floor pan - I decided to not replicate the asinine behavior I had done before on some of the other problems. I pulled up a chair and stared at this floor pan for a good 30 minutes. (Eyes bugging out) It came to me like a smack in the face. There's a gasket and rubber spacers that go on the mounts. I realized that it raises the pan up just enough above the jack stands. DONE! No cutting or welding needed. That could have been a total #$#$ show! On to the next dilemma....


The doors.....those damn doors. These sharts were worse than I remembered. The drivers side door skin had come apart from the inside door frame because it was totally rusted out. So I found some sheet metal and used some metal snips to cut out a 35" by 4" rectangle. I then used my vice, ball peen hammer, and sheet metal pliers to create a U-Channel that I could weld into the bottom of the door to secure the door skin. I had to snip and grind out the rusty crap to find good metal to weld to. Once I got it secured it worked perfectly.

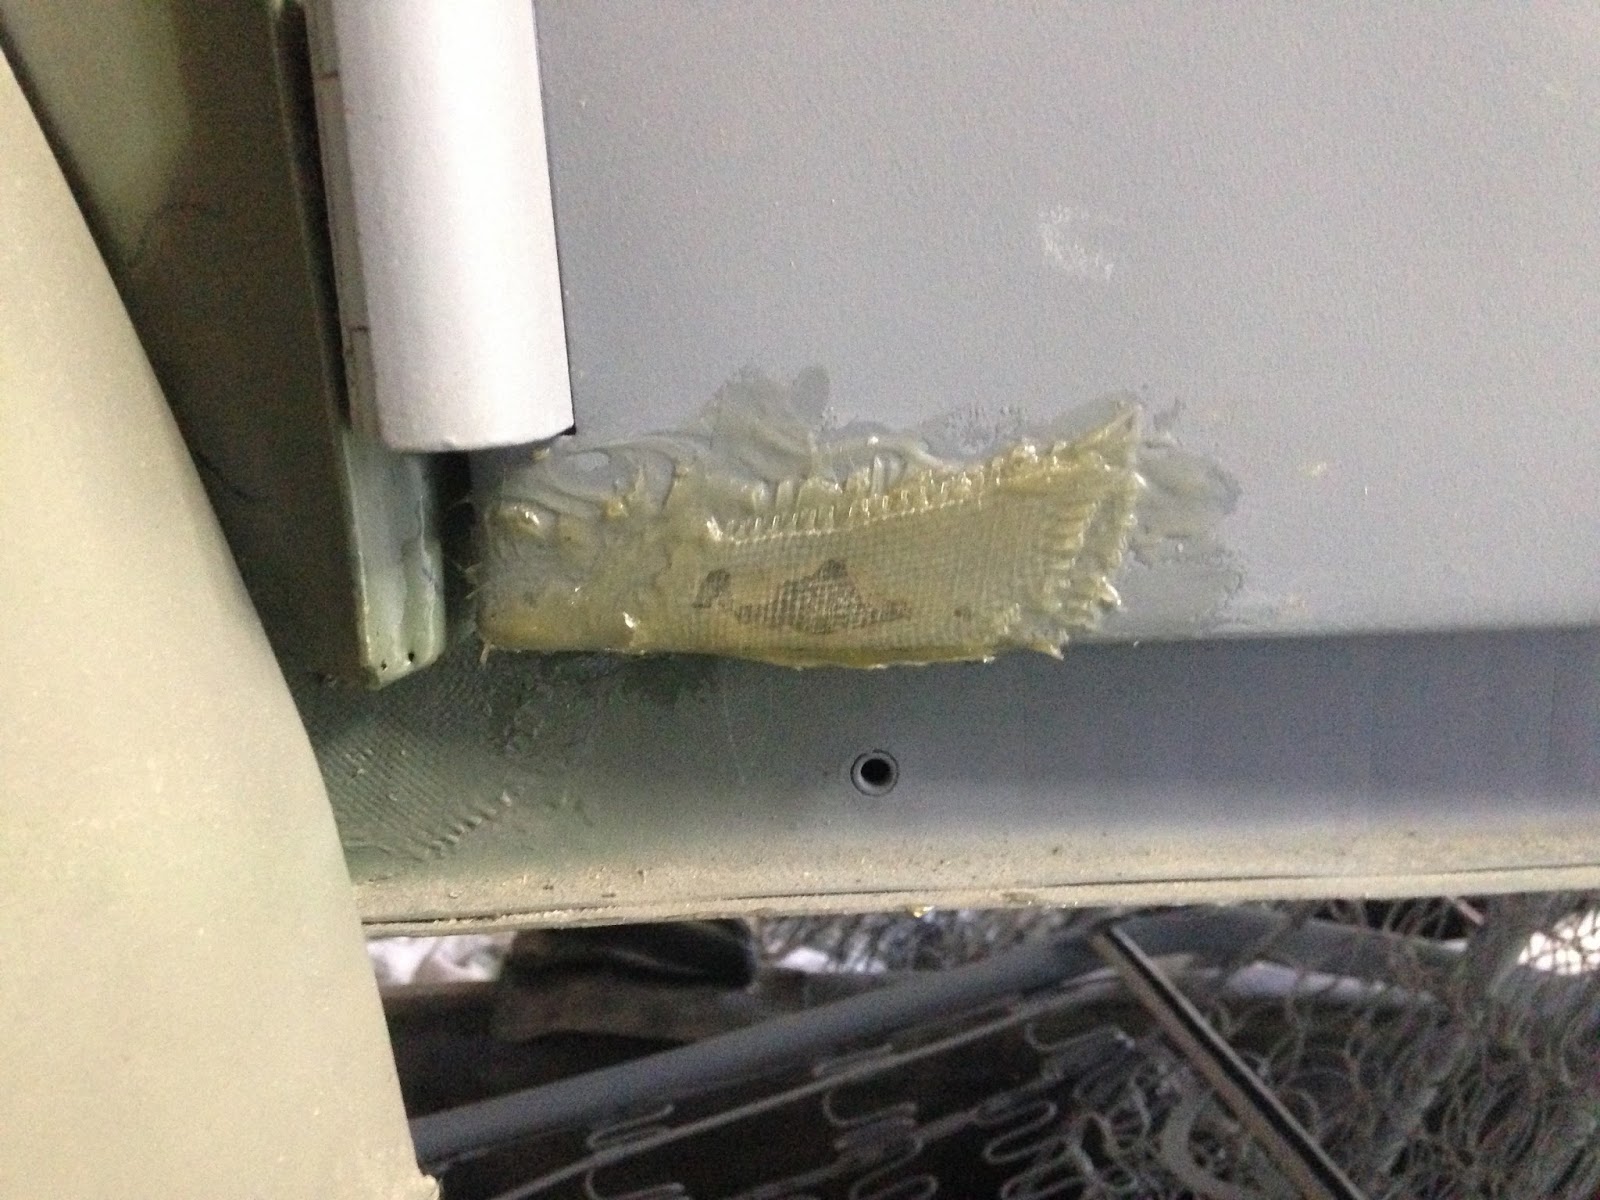
 The bottom of both corners were rusted out so the only two options I had were to fabricate with metal and weld in or use fiberglass and filler. So before I hear backtalk from any Judgy McJudgersons, let me tell you.....after SEVEN years, you start asking yourself, WHISKY TANGO FOXTROT did I get myself into. I went with the fiberglass and filler. It came out damn good. That's all I'm going to say.
 So then life gets in the way. Oh hell....I got lazy! I let that car sit for way too long. THEN.....we move! We have always wanted to live on a small farm. The prospect of land, old restored home, NO HOA...I could sucker punch HOA in the throat....just saying. We looked seriously for property for everything we wanted for about 3 years and just couldn't find anything affordable. Then one day I looked outside of Raleigh. We found the place we always wanted just outside Clover, SC and York, SC. It was right before school was starting so Whitney and I teamed up and made it happen! So Green Acres here we are. Three horses, five pigs, four dogs, four cats, a fish, thirty five chickens, and three baby goats on the way (eyes rolling). My wife LOVES animals. NO MONKEYS. That's where I draw the line.
So we didn't sell the old house before we moved into the new house. Serious problem. The new house has a garage but no big garage door! It was converted into a workshop with a normal "man door". So the house sells and I have bring the Oval to the new house and park it OUTSIDE....with a car cover! So every time it rains, I can hear the faint cries of tortuous rust easing its way back through the surface. Imagine yourself with $1000. Then every day taking $1.00 and wiping your ass with it. That's pretty much how I feel.
So.....out of the blue my good friend Jon emails me and asks if I have made any progress. I'm sheepishly honest and tell him I haven't done a damn thing. This guy......this guy tells me he'll come down for a three day weekend and pain the car! I'm speechless. I'm stunned. I'm overjoyed. I can't describe to you the relief!!! So we make plans for the last week of April. I've got some last minute work to do with filler. Finish up the ugly bag of hammers H-Apron, touch up some random parts for paint, fix the corners of the doors, and of course.....all the BLEEPING surface rust that has come through here and there. I've got to seriously hustle but work and life is just relentless. There's no way I'm going to get this all done before Jon gets here. So I bury my man card and I ask a buddy if he'd like to make some cash on the side and do some bondo work. He spends about eight hours and gets it all done! I sanded all the surface rust and coated some other tough spots with POR-15. It's all ready.
Bad news.....rain crashes the party like tequila showing up after 15 beers. We reschedule two weeks later and by God the weather is perfect! May 14-16 is set for the painting party.
 I got all the paint materials, build a 2x4 frame with a tarp to keep shade over the Oval, and I'm all ready. So Saturday comes around and well....we didn't account for the temperature even through the sun would be shining. The paint chemicals I bought were for warmer weather.....CRAP. The paint shop was closed on Saturday so we had to wait until Monday to exchange the paint. Looking at the forecast, it's going to rain that Monday around midnight and HARD. So basically, I'll have freshly painted oval that need to cure overnight and rain will ruin it.

Have you ever said something as a joke and suddenly realize that it's a damn good idea? The garage I have was converted to a workshop and a "man door" was put in place of the one car garage door. As Jon and I are scratching our heads both avoiding the decision to put off painting I say, "well we could always cut a hole in the garage door....ha ha". Jon looks at me and I can see the wheels spinning. We decide to go to Plan B. We spend half of Sunday converting the garage back to a one car garage door. Header, studs, etc. Problem solved! Now the Oval has a great place to rest while the pain cures.
So for anyone who doesn't know how a car is repainted prepare yourself. It's not something to take lightly. We had to fill pivots, last minute dents, low spots, sand, wipe down, prime, sand again, wipe down again, clean with a degreaser, wipe down again with tack cloths.....it's ridiculous. EVERY INCH. Oh...we had to attach the spring to the engine deck lid because you don't want to mess with that after paint.
Let's talk about this deck lid. I've never seen anything so confusing in my life! There are four brackets it's attached to with eight points of pivot/adjustment....i think? You have to adjust this thing back and forth so that it doesn't rub against the body when it opens and closes. And when that doesn't work, you have to bend and push on it to make it work. What's funny is that is what the Germans did in the factory! I'd rather poke myself in the eye with a flathead screwdriver than do that all day. Well, we got that adjusted and moved on.
So Monday comes along and I exchange all the paint and we finish up the last minute prep/wipe downs. After scouring this car, somehow I missed two holes in the drivers side interior door that some ass hat decided to put a cup holder or something on. I race to the auto parts store and pick up a 5 minute epoxy that cures in an hour. We get that filed down and fixed and FINALLY we are ready to paint.
We (Jon) get painting right about 5:00 PM. I notice Jon's mood changes. This guy is getting the jitters thinking about painting the car! This guys is all class. He wants this car to come out top notch and he's worried about how he is going to perform. Moment of silence for Mr. Turner...........Thank you.
 Before my eyes, I see the transformation. I see the color go down and slowly swallow up the grey and pink filler spots. It's like a fountain of youth for old cars. The clear coat goes on but this is tough. We're outside, in and out of sunlight, I got a neighbor who decides to cut the grass who hasn't mowed in 3 months...literally, I got wind picking up, and I got the twilight bugs all coming out. But Jon nails it. I'm overwhelmed with excitement, relief, gratitude, and wonder. This car looks amazing! It's like a brand news vehicle off the factory assembly line in Wolfsburg.
So we finish up right about 7:30. We stand back and sigh in relief. We decide to let it cure until about 11:00. We need to set it back down onto the floor pan so we can roll it into the garage (yay). Jon gets in the car and turtle lifts it so we can pull out the 4x4's and lower it. The rope holding the hood rips apart and the hood slams shut! The damn thing is tacky and is STUCK! We are struggling.....tired.....no idea on how to open this thing back up. If it stays closed, the paint will seal together and rip off when opened after it's dried. Suddenly, a small voice in the background quietly says, "I know how you can open it. Use a wall anchor through the latch hole and then pull it up." Jon's TEN year old boy saves the day! We look at each other in silence then in concert both say that's a great idea. Open it does :)
So now I have this beautiful car. Resting quietly in the garage. This is the moment I have waited for. No more adjusting. No more fixing. No more excuses! I get the instant gratification of putting all new parts on. AND I have place to do it that's inside and no threat of rain and rust. Ahhhhhhh. Yes, I'm in a good place.
Credits: If everyone had a friend like mine this world we be a better place. Jon Turner, I thank you, your kids (especially Brandon for his genius 10 year old mind), Angela for putting up with my needy and crazy hours. I will never be able to thank you enough. You are indeed a fart smeller....I mean a smart feller.
 Oh.....this is big. We had a breakthrough on the beetle. There have only been a handful of hurdles on this project that put me in mental prison. The one that has been holding me up is the heater channel holes not lining up to the holes in the floor pan. You see, when heater channels are replaced, they are often not a match to the original pan. They have to match up or you can't put the bolts through to secure it. I don't know why but this one kicked me in the groin.


 Next morning arrives and I remove all the painters tape. All is good with the seal! Except....I'm called to do some chores so vacuum, mop, bathroom cleaning, and grocery shop. Keep momma happy ;)
 [Tip to those lifting the body up and down. It's wise to loosen the shock nuts and back out the bolt so that the body will clear past the bolt without scraping. just tighten back when you get the body on for good]
 So I proceeded to get the rear wheelhouse bolts on (although realized I needed square plates to put on. Still have them, but didn't show up in the picture). Front two beam bolts, and eight bolts across the back seat. It got late so I haven't done the 9 bolts along each heater channel and two at each front corner. I expect there will be some shifting, cursing, and sweating to get those done. I'm not 100% confident that I got the rubber holes perfectly lined up so there could be some persuasion.