Wednesday, July 27, 2011

One Giant Leap.....


I remember Jon bringing over that engine.  I thought it looked so good.  I was excited because the rumor was that it was running at one time.....I suppose all engines do now that I think about it.  I remember taking it apart wondering how long it would take to put back together.   Longer than I thought!  I mean seriously, how could it possibly come back to life?  There is no telling what could happen.  I've only taken an engine apart.  I've never actually put one back together!  I had all these parts and I'm genuinely not completely certain what to do with all of them.  Nonetheless, I pressed forward.

But now the day had come....I couldn't stand it anymore.  Jon and I have been coordinating, talking, and getting closer to firing this engine that has been hibernating for just about 20 years.  
Jon was to come over in the early evening.  We had a few adjustments to make; valve adjustment, points adjustment, timing, etc.  I decided that there was no time to waste, so I made all the adjustments before he came over.  That way there was ample time to try and get it running in case something went wrong.  The two of us were able to pick up the engine and maneuver it onto the transmission with little trouble.  We tightened it down and attached the starter, which is 6V.  I decided to keep that despite the rest is a 12V system.  That way, the car will start with VERY little trouble. 

I forgot that I had to fix the boots that go over the transmission and the swing axle.  I still needed to do a transmission fluid change and I couldn't do that until I fixed the boots. If you recall, I F#$% up a boot one night with the heater wire that was sharp.  I took out my rage on our poor garbage can.  Times were tough at the time and I was pretty stressed out.  The best part is that Steve was able to witness (translation....laugh his ass off) me embarrass myself.  Anyway, I took the plug out of the bottom of the transmission and being magnetic, it yielded what I'm calling the "Revenge of the Black Booger".  All sorts of sludge, metal shavings, seal springs, etc showed up there.  I cleaned it out good and we put new oil in the tranny.  All set.
We hooked up the battery with all the wires and cables looking like someone dropped loose spaghetti around the engine.  It would do the job though.  We fed it some gas and starter fluid and checked to see if the carb was functioning.  All is good......we jumped the starter.....and nothing.  The engine was turning but no firing.  We finally realized the coil wasn't getting any juice.  The rig we created wasn't so good after all.  It was a remote starter that needed to be depressed harder.  So I pick it up and press it down harder while Jon jumps the starter again......Brumm...Brummm.....PaaaaaaDOOOWWWW!  It turns over in 5 seconds or less!  Sure it backfired a bit and choked a little, but the damn thing CAME TO LIFE!!  I got so excited I forgot to hit the accelerator and it stalled :)  We started it back up and let it run for a bit to break it in.

 The conclusion was that it runs great.  I need to rebuild the carburetor, weld in the J-Tube exhaust pipes, change the main seal (we had trouble putting that in and thought it might leak....it did), and then she's all good! 
 
This was a major turning point.  I feel like I'm ready for the body to come back, get the wheels done and back on.  I'M READY TO DRIVE.  The day is coming that I'll be taking the family for rides to the grocery store. I already love this car and it's in pieces.  But it's alive now.  It's no longer a dream or fantasy. 
 
 My wife, Whitney, even said, "I can't believe it's actually running".  She was truly in awe and in the moment that the time is coming.  I've done many successful things in my life.  I've been a Bartender Champion (at least twice), I've been Sales Rep of the Year (the only rep to do so three times in a row), I've earned my Eagle Scout rank, I've climbed to the top of the tallest mountain in New Mexico, and many more accomplishments.  But I haven't felt that kind of excitement in quite a long time.  I literally jumped for joy when I heard that chirping and puttering from that crappy old engine.


Tuesday, July 26, 2011

Steering My Patience

 I had an option to either fork over $350 for a fully restored steering wheel.  I actually had one that is in pretty good shape.  The problem areas are around the ribs.  There were a heck-uv-a lot of cracks too.  This is a shot of the wheel before I disassembled the car.  This is what it looked like in the condition I found it.  Not too shabby!  So I read up to see what the best way to bring this back to life and if it's actually something that is doable.  I went ahead and bought some POR-15 Epoxy that seems to work really well.

The POR-15 is water based and it easily smoothed out.  It's almost like paste so it's easily malleable.  What it requires is an ENORMOUS amount of patience.  You can only really do a small area at a time.  I'd mix the two part expoxy, get my fingers real wet, and press the stuff into the cracks and smooth out as much as possible.  Once it dries I would use three types of sandpaper.  80 grit, 120 grit, and 300 grit.  Using this I was able to get this very smooth and bring a consistent shape and look to it.  You can see the middle that has been quasi-finished.  I figured I can work on this over the next 4-8 weeks as I have time.  I can set the putty and let it sit over night.  Then the next time I can sand it down and start over.  Hopefully, it will come around looking presentable.  I figure I'll take my time on this one because it's the one thing that you'll be touching the most and looking at the most every time you drive.  Might as well make it look good.  If I screw up.....I'll break the bank for $350 and say screw it!

Friday, July 22, 2011

36 Horses Corralled

I've come to a conclusion QUICK.  I dyin' to get this engine back together. I'm waiting patiently for the body to be finshed, prepped, and painted by Steve's co-worker, Chris Bolin.  He's slammed at work right now so it appears to be taking a bit longer than we anticipated.  Quite alright alfter all.  Medical bills are more painful at the moment than the procedures themselves!  At least I have this engine to focus on.  So I get on the e-horn and holler at Jon to see about coming over and figure out how to put all these floating parts together.

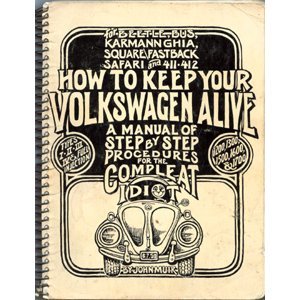
So I've ordered all these parts....their sitting in cardboard boxes, on shelves, and on the workbench.  I just keep tempering myself and reviewing the parts, reading the Muir Bible..."How to Keep Your VW Alive Forever, a Manual of Step by Step Procedures for the Compleat Idiot".  Let me have a pondering pause here for a moment.

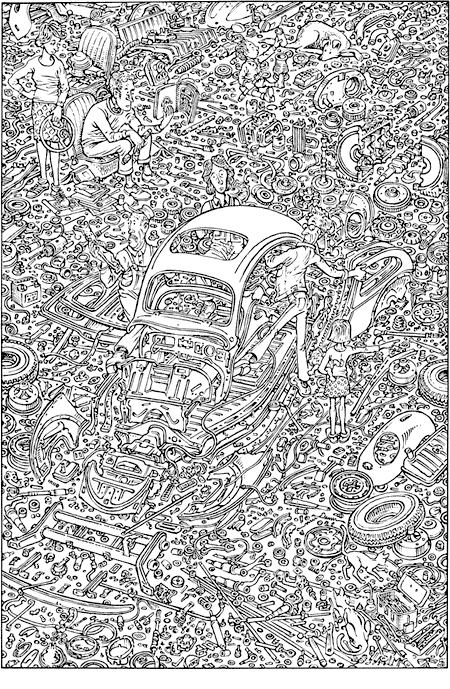
This guy was a VW genius......but he also looked like he was a couple of miles from the Kool-Aid compound.  The artist that did the pictures in this book are phenomemonal too!  Jon and I were working and talking about this book and both of us are just SO impressed with the detail and accuracy?!  I mean this pictures has ALL the parts of a stinkin' Beetle.....I SWEAR?!!  Look for yourself.


God Bless you John Muir.......


So I've got all the parts polished and cleaned off.  I used this Purple Power stuff that worked TEN TIMES better than a standard engine cleaner.  Careful recommendation though:  Use gloves because I swear I turned my hands into 80 grit sandpaper.  Truth be told :)  I put all the cylinders and pistons into the dishwasher to get all the grease, gunk and dirt out.  Second recommendation: make sure you run dishwasher again empty to get all the crud out that is leftover from the first run!  I headed over to Hicks VW and find all the screws and nuts that I need for the engine.  He helped me out.......after begrudgingly letting me know that he didn't "have time to mess around with no F#&$'N 36" HP engine.  I promised I would buy the roof rack just so he would keep helping me!

 The first step was to hone the cylinders and use a valve seating compound to get the cylinders to seat right into the cylinder heads.

So now the cylinders are ready, we have to use a ring compressor to get the cylinders over the pistons and rings.  Of course the one I bought doesn't work.  But what worked great was a 3-1/2" Hose Clamp from the hardware store for $3.00!  Once the cylinders went on things really started to come together.  We used assembling grease, anti-seize grease and 30 weight oil for most of the parts. 

I also had been storing the push rods somewhere safe so that they wouldn't get bent.  I've been watching them everytime I open my cabinet to get the measuring tapes.   I had to take this picture because I was so happy to take them down and finally put them back into their home :) So I continue getting all the other parts, gaskets, slowly added to the block.  I ran into a few glitches because the engine was missing a few parts here and there.  The rocker arm assemblies were missing the stud cradles that you screw the nut to keep it in place.  The fuel pump camshaft was missing too.  Not a big deal, but I had to order the parts from Wolfsberg West.  
 Now I came to a few revelations by accident.  Jon and I were looking at the generator pulley noticing that it wasn't lining up correctly with the crankshaft pulley.  We farted around with it trying to get it to fit correctly.  Then I looked over in the parts pile and saw a brass pulley that Steve had given me.  It looked like it would fit and so it did!  I look on the pulley and it says "12V".  So then I look around on the engine and the coil shows 12V, etc, etc.  So now I'm convinced it's been updated to a 12V and with an alternator.  That's good news, I suppose.

So I get everything assembled and finish with getting the exhaust system including brand new J-Tubes. The engine studs and intake studs were a bit tricky but I was able to get them settled with either new studs or the existing studs.  The next challenge was the distributor.  After much research, trips to Hicks VW, and calls to Wolfsberg West, I discover that I have the correct "019" distributor but I have the incorrect cap. Someone had modified a smaller cap to make it work.  This gave me a good chance to clean out the distributor, change the points, and replace the condenser. I hadn't realized how much attention it really needed.  I also took that opportunity to clean the air cleaner, carburetor, and the fuel pump.

So now I'm ready to go.  Bought a battery, filled it with the 2.5 quarts (plus 0.5 quarts in the air cleaner to red line, of course) and I just need to hook up the fuel lines, set the timing, and adjust the valves.  Then. POP. POP. POP. KABOOOOOOOM.  Out from hibernation and she'll be back to life!!!

Tuesday, June 14, 2011

Drivers.....Start Your Engines

I've started to day dream about what it will be like to have the body show up and what I'll do with it when it gets here.  The cold reality is that it's time to put the car together.  It's like my friend Jon has been telling me.  At some point, after constantly feeling like you're going up a hill feeling like it will never end, you suddenly at the edge of a cliff looking down a very steep hill.  It all feels like it's quickly happening now.  I realize that if the body arrives, I need to have the chassis COMPLETELY ready to receive it.  I need to have all the bolts, body gasket, brakes, etc all ready to go. 

In fact, I really need to have the engine running and ready because it will be far easier to mess with it with the body off.  In fact, after consulting Wolfsberg West, they tell me that is exactly how Volkswagen assembled the cars.  Who am I to argue with the Germans?  (NEIN! in my best German accent).  It would be helpful if I had an assembly line and several chaps to help me, of course.

So now I'm motivated to get my act together and get the right parts and pieces in house so that I can get this all ready for the "show".  I took a trip to Hick's VW in Durham, NC.  Good operation that Bob has there.  Really cares about the cars and your best interest.  I had him take a look at the cylinder heads to see if they would work.  Jon met me there that day because he had some parts to buy too.  After we all looked at the innards of the engine case, cylinders, pistons, heads, and rings it all looks great!  It's really ridiculous if you think about it.  The engine had run before.  It's a 36hp that hasn't run since the mid 1980's.  It has sat on a mechanic's shelf, Jon's shelf, and then my shelf for almost 20 years but the damn thing looks good!  So now I've ordered all the parts that I need for the engine from Wolfsberg West and bought some from Bob at his shop.  I swear I cleaned out every 36hp part he might have had in house......he's probably grateful I got that stuff out of his inventory.


Let me pause here too to brag on Wolfsberg West.  Not only do they offer themselves as a resource when you speak with them on the phone, but you can tell they take great care in how they send their parts.  It arrives well packaged.  They also will sell you used parts if they don't have something in stock.  Most other folks would just backorder you or send you the wrong part intentionally and make you return it so it doesn't look like the are backordering......bastards.  I commend and recommend Wolfsberg West as a primary supplier to any Air-cooled enthusiast.  

Now that I have the parts, I've got the engine clean, and ready to assemble.  I just need to set aside some time to pull all those parts together.  I think I'll wet myself the first day I hear the engine run.....take your bets.  

The Sting

I'm sitting in my hotel pondering whether to order a crappy pizza or muster the energy and hunt for my food in the urban jungle of Charlotte. I get a strange email in broken English on my iPhone telling me they will gladly pay $50.00 to pick up my car. What the....(rubbing my chin). Son of a nutcracker! I see a picture what is clearly my 57 Oval on a flatbed! Fumbling for my phone, I call for my wife after mis-dialing in a panic, and ask her to go into the garage and make sure my car is in there. She seems to be taking her sweet time and I continue to press and ask her if she sees it or not. "Why?" she simply asks.

Now you have to understand that there is a dance that Whitney and I do. Having been stolen from before, I always lock the doors and keep the garage door shut. She (innocent and naive.....snicker, snicker) doesn't seem to have the same priority. I always have the same comment that if we leave the garage door open when we are not home someone will go "shopping" in our garage. Mainly for my tools!!

Coming back to the story at hand.......at this point, I'm sure that someone has gone shopping in our garage and has taken my car away and it's gone for good! Suddenly, she stops me as I begin to tear up and tells me, "Happy Anniversary :-) ".

Silence......What is she talking about? Come to find out, she arranged to have our neighbor's co-worker to come and pick it up. Steve next door helped out to get it out of the garage.  They all had been in on the Sting for weeks!  Chris will finish up some of the minor body work and then prep for paint and paint the body, doors, hood, decklid, wheels, and misc parts. I was slack jawed! After the shock faded and the reality set in, I was STOKED! In a about 45 days I'll have a beautiful painted body in my garage to set right down onto the finished chassis.
 A couple of weeks later, I head over to Chris' shop to take a look and talk about what needs to be done and what direction to take.  He had the Oval already on a welded rotisserie with the apron welded and the rear bumper mounts welded in.  It was very well done.  Not grafted on without any care or thought of potential rust that might come back and haunt you, but almost surgically implanted after the worn out part has been removed.  I was impressed.

Thursday, May 5, 2011

Rear Arpon Assembly


The time has arrived. I promised myself that I would start back on the bug when the baby girl, Katie, turned 6 months old. Almost to the day, I dragged myself into the garage and tried to figure out where I had left off. I really knew where I had to focus my attention to, but I felt if I put my thoughts onto paper it would help.
The next major phase, is the rear apron. I had to call in reinforcements again......Jon Turner extraordinaire. I needed some guidance while I admit that I'm feeling more and more comfortable with this kind of work as the project continues. So the first step was to cut out the problem area on the apron without losing the historical integrity and structural integrity. It was hard to cut out with snips so I bought a pneumatic circular saw to make this cut go fast. The reality is I just "need" a new tool. After I cut it out I took some snips and cleaned up the edges.
 
The next step was to take the new apron I bought from Wolfsburg West. It seems ridiculous to hack it up with snips only to be left with just about half of what you started with. However, it does make sense. I was able to carve out the extra part so that I can piece it all together.  Of course the next day my hands felt like

someone had punished me like some Fraternal Ritual  by slapping my hands with a 2x4 until I cried.  It was worth it.  I then popped out all the spot welds to take off the weather stripping seal since the original is far thicker and is still in good condition.

Now I took the clipped piece and fitted into the rear apron cut out.  I had to make a few extra snips here and there to make sure that it would slip in nicely.  There is overlapping metal where the rear is welded together.  I popped it open slightly so I could slide the new apron into place.  With some gentle persuasion it slid in so easily.  Probably the one thing that has gone smoothly so far!  I took a rubber mallet and gave it some taps and it looks great.  I still need to take off that crappy black primer that they ship the parts with and weld the new piece in permanently.